Realistic Snow Dynamics in Unreal Engine 5.1
Introduction
This project utilizes Unreal Engine 5.1 to implement realistic snow dynamics, employing virtual runtime textures and dynamic GPU-based Level of Details (LODs) for efficient simulation of snow displacement. By utilizing a web of shaders and material expressions, I developed a method for detailed landscape mesh displacement that can work with any actor in a predetermined “snow” zone.
During this project, I navigated through several technical challenges, including performance limitations and the use of Unreal 5.1’s Virtual Heightfield Mesh (VHM) plugin. Ultimately, a mix of various techniques were required to achieve the desired snow trail effect, including leveraging Nanite tesselation.
Inspiration for the Project
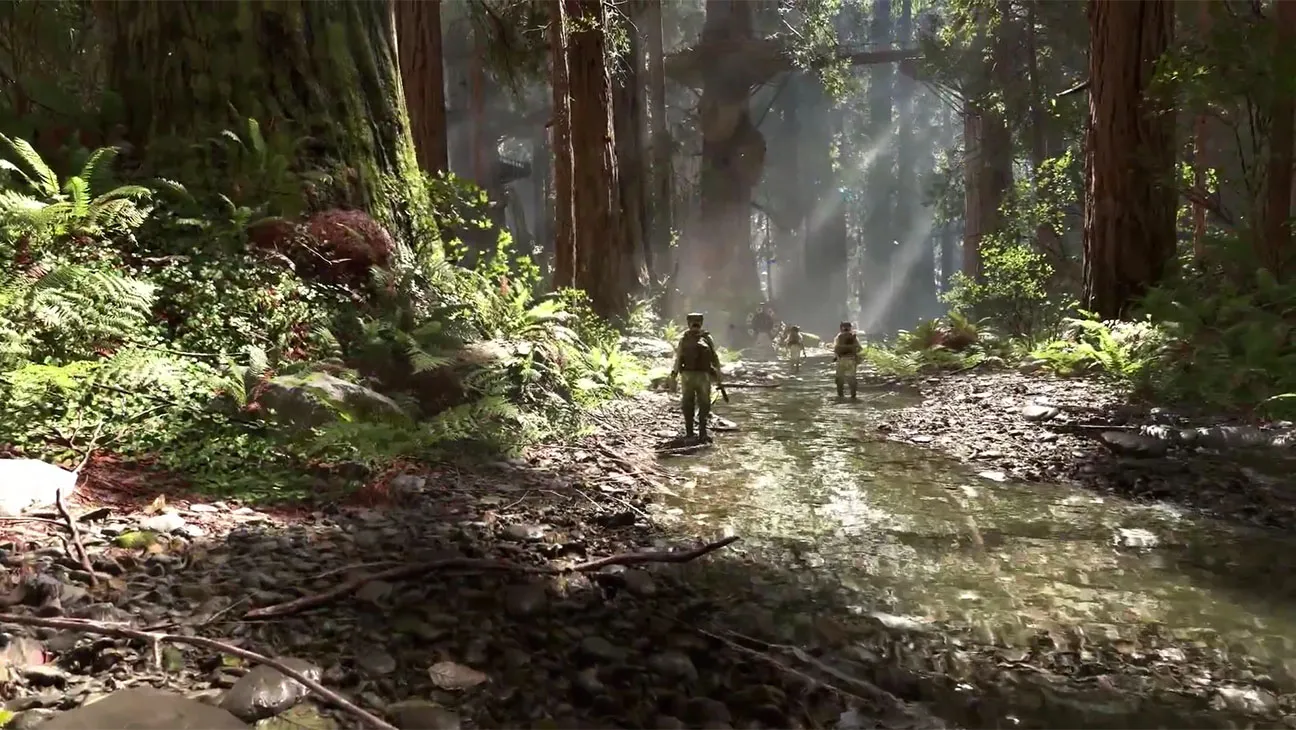
I recently rediscovered the trailer for Starwars: Battlefront, developed by Dice in 2015. Although it’s close to 8 years old, the game offered impressive production design. The artists and designers blended artistic style with immersion effectively, offering a taste of what it might feel like to be engulfed in a Star Wars-themed warzone.

The Hoth and Endor maps are excellent examples of cohesive environments. The worldbuilding perfectly balanced natural landscaping, foliage, and terrain without sacrificing good level design.
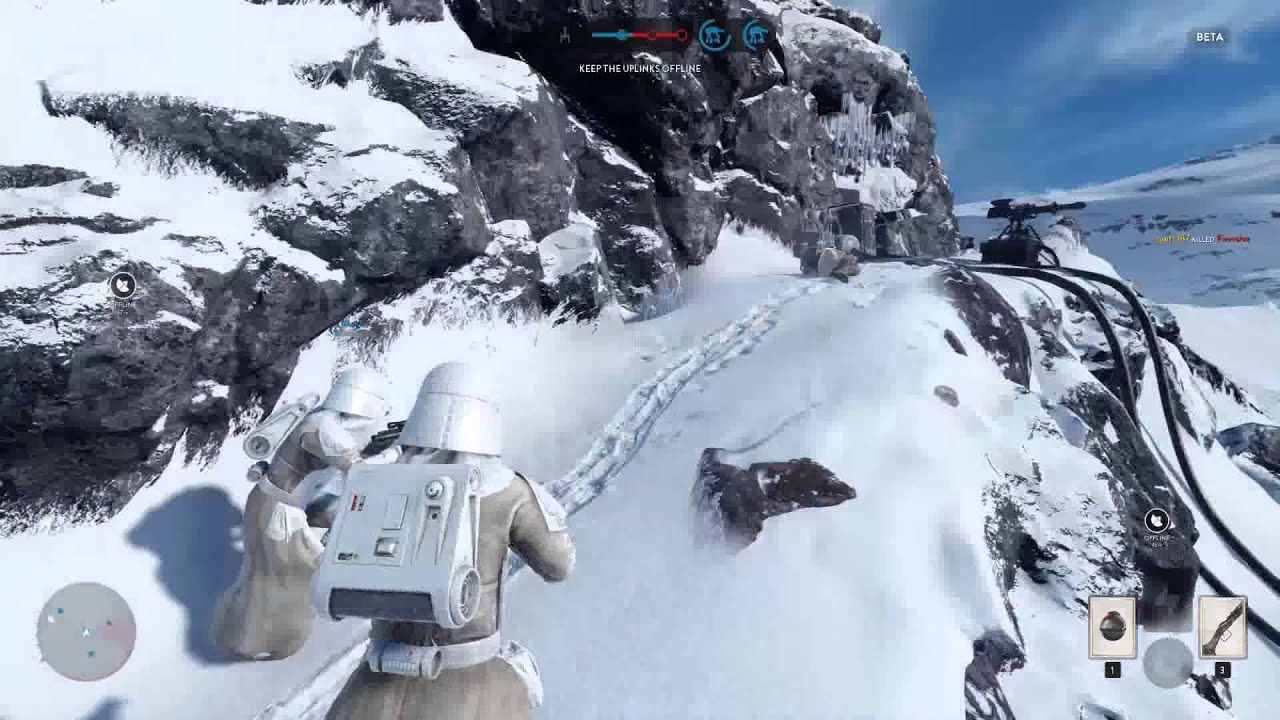
 Hoth features a mix of both static snow trails placed by designers and dynamic snow trails generated by footprints and vehicles. This particular example is a static trail meant to guide the player to a strategic position.
The developers seemed aware of how player interaction can impact immersion. This is most notable in Hoth, where snow is displaced as characters and vehicles around in the outdoor landscape. This small detail significantly improves the player’s experience by forging a deeper connection between the environment’s dynamics and the player’s actions, resulting in a more integrated and holistic gaming experience.
As part of a series of 2-week hackathon sprints, I decided to reimplement this snow dynamic in Unreal Engine 5.1. What seemed simple at first turned into a wild adventure that involved several hundred material nodes, shady game-dev websites, broken files, and 2 system restores.
The Problem
Displacing snow seems relatively straightforward and arbitrary to implement in a modern engines. The basic idea is to “record” displaced snow into a buffer, such as a texture or other intermediary storage, then convert this data into a format that can be understood by the engine to modify the shape of the corresponding landscapes. Most examples I found online lacked in areas of design, flexibility, or overall feel. My objectives for this system were to:
- Emulate actual displacement of snow by deforming the landscape in any arbitrary direction around the object with optional controls for density, shape, and depth
- Create a actor-agnostic system
- Tesselate based on camera distance to manage performance over several LODs
Deforming the Landscape Mesh Manually
The first strategy I investigated was tessellating and deforming the landscape mesh itself, but I found this solution to have some performance limitations. Utilizing tools like the Voxel plugin would be a much better option for destructible environments that deform less frequently than snow trails, such as artillery creating craters in the ground. Interestingly, this is another subject I intend to explore in an upcoming hackathon, and with the insights gained from this project, it should be a much smoother process.
Another drawback is that runtime mesh deformation is, by nature, not actor agnostic. To deform a landscape via interaction with dynamic objects would require those objects to be registered in memory, necessitating a substantial amount of bespoke gameplay programming.
Deforming Using World Position via Material Expressions
The strategy I decided on was to use shaders and material expressions to handle per-pixel world displacement of the landscape mesh. This would allow me to engineer a less complicated solution for data management, writing most of the logic for snow displacement into a height map texture buffer, then rely on my knowledge of shader code and look development to achieve our end goal shader-side. This is advantageous since our snow materials can layer with our snow displacement masks seamlessly (or so I thought).
Recording Snow Displacement
The first step was to implement a way to paint snow displacement from objects inside our landscape canvas. One goal I had from the beginning was for the displacement to work with any object in the snow environment, without requiring code on the actors – including the player character. This would make the system more flexible and sustainable as the boundaries for what to paint into our buffer would be separate from the actor itself, requiring much less overhead from a worldbuilding perspective.
Creating a projection texture
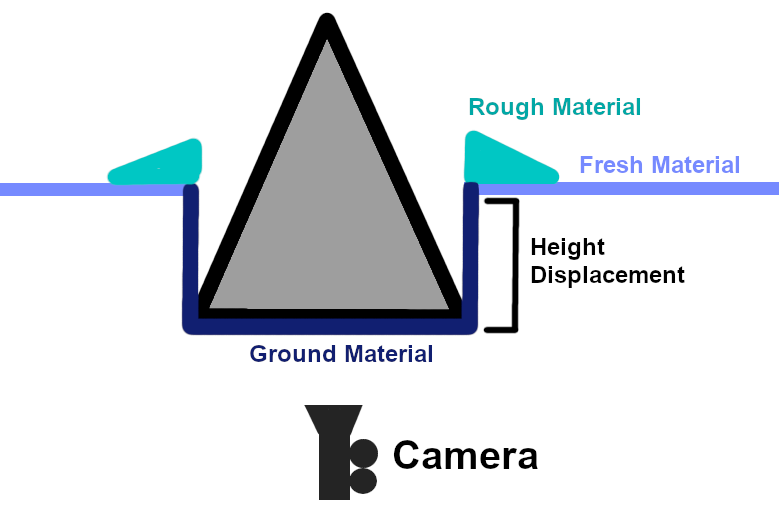
 The different colors in this diagram represent different materials. The camera is positioned below the canvas (without FOV distortion) and captures all displacement. Note that the displacement for a cone, pictured here, is not based on the cone’s overall shape, but the cross section of the points that make contact with the snow.
I discovered a clever way to achieve this by using a render target texture, recorded from a camera. I first positioned a camera actor far bellow a designated landscape canvas, then pointed this camera in the Z direction to record any object’s XY plane cross section, up to an arbitrary depth, into our buffer. This means that a character walking across a pile of knee-height snow would displace the landscape realistically, starting slightly below their knee. Likewise, an object such as a cone would displace the entirety of its base rather than the cross section at the snow’s apex height. Saving each frame of the depth camera texture into the same buffer texture was straight forward and involved 3 different materials and some minimal code on our landscape actor.
 The white areas in this render target texture represent objects that are between 0 and 10 units in the positive z direction, starting at the landscape’s world position for each point on the landscape canvas.
This means that any area on our landscape that has our dynamic snow material will automatically utilize the projection camera to displace snow from objects on the landscape.
Emulating Snow Displacement
As a character moves through the snow, each step pushes the snow to the sides, forming a visible trail. This trail is marked by distinct footprints and areas where the snow is compressed. For an accurate depiction in our trail design, we need to use three different types of snow materials:
- Fresh: Untouched snow for the undisturbed areas
- Ground: Compressed snow, representing where the snow has been packed down by the objects.
- Rough: Displaced snow, indicating snow that’s been pushed aside and piled up around the trail.our snow
We can determine where to use these materials by taking our projected texture and generating masks. These masks can be used in our landscape material expression to determine which material to use.
Painting a Dynamic Material Masks
Creating a dynamic material mask is not simple in Unreal Engine 5.1. For this project, I needed to create a series of layered Runtime Virtual Textures (RVTs).
A Runtime Virtual Texture in Unreal Engine captures a scene’s details in real-time, helping to manage textures efficiently. This improves game performance, especially in large areas, by using less memory and keeping graphics smooth. This will allow us to maintain performance when painting our material masks, which will need to update on every single frame.
Running a conversion on our high-resolution camera projection texture into our masks on every frame is far too expensive. Instead, I programmed the landscape texture to capture and record projections for each object on the landscape per frame. We can generate a mask form each individual object texture on its own, then compress them into one giant masked texture by doing simple material addition on our RVT. Below is a side by side comparison.
 In the screenshot above, the trails are generated from material masks. Green represents our Rough material, and red represents our ground texture. Any area without a color is assumed to have a fresh material.
Why do we use colors on the RGB spectrum instead of a single channel, like in compact height maps? For one, I wanted a way to blend our rough, ground, and fresh materials naturally. If a player is pushing rough snow into an area that already is already compressed with a ground texture, then those two materials should be able to blend naturally. If we use a single channel, we won’t be able to tell where the height for our snow trail is being generated from, and what combination of snow types.
The rough snow mask is generated from a spiral blur. This is extremely expensive, but for RnD purposes works sufficiently until I can implement my own growth function. This is generated by a material function that is assigned to our landscape (which is the target of our camera project RVTs).
Right now, our landscape looks like a black canvas with mask channels layered on top of each other. Now that we have a texture which abstractly represents our material, we must create the snow landscape, which will be float above our base landscape mesh.
Handling Tesselation
To create our snow landscape mesh, we will create a landscape the size of our existing landscape, then deform it using our RVT mask texture. To do this, we need a strategy to tesselate the landscape to displace each pixel in the positive/negative Z direction as necessary.
Epic Games made several decisions with Unreal Engine 5 which complicate the implementation of our landscape materials and shaders. First, tesselation was removed as an option in material attributes, as this feature was intended to be fully deprecated by Nanite and dynamic LODs.
Utilizing Virutal Heightfield Mesh
Unreal 5.1 provides us with the Virtual Heightfield Mesh (VHM) plugin to handle terrian height displacement on the GPU. Besides being experimental and unsupported, there’s several issues with this platform, but that’s a different topic for another time.
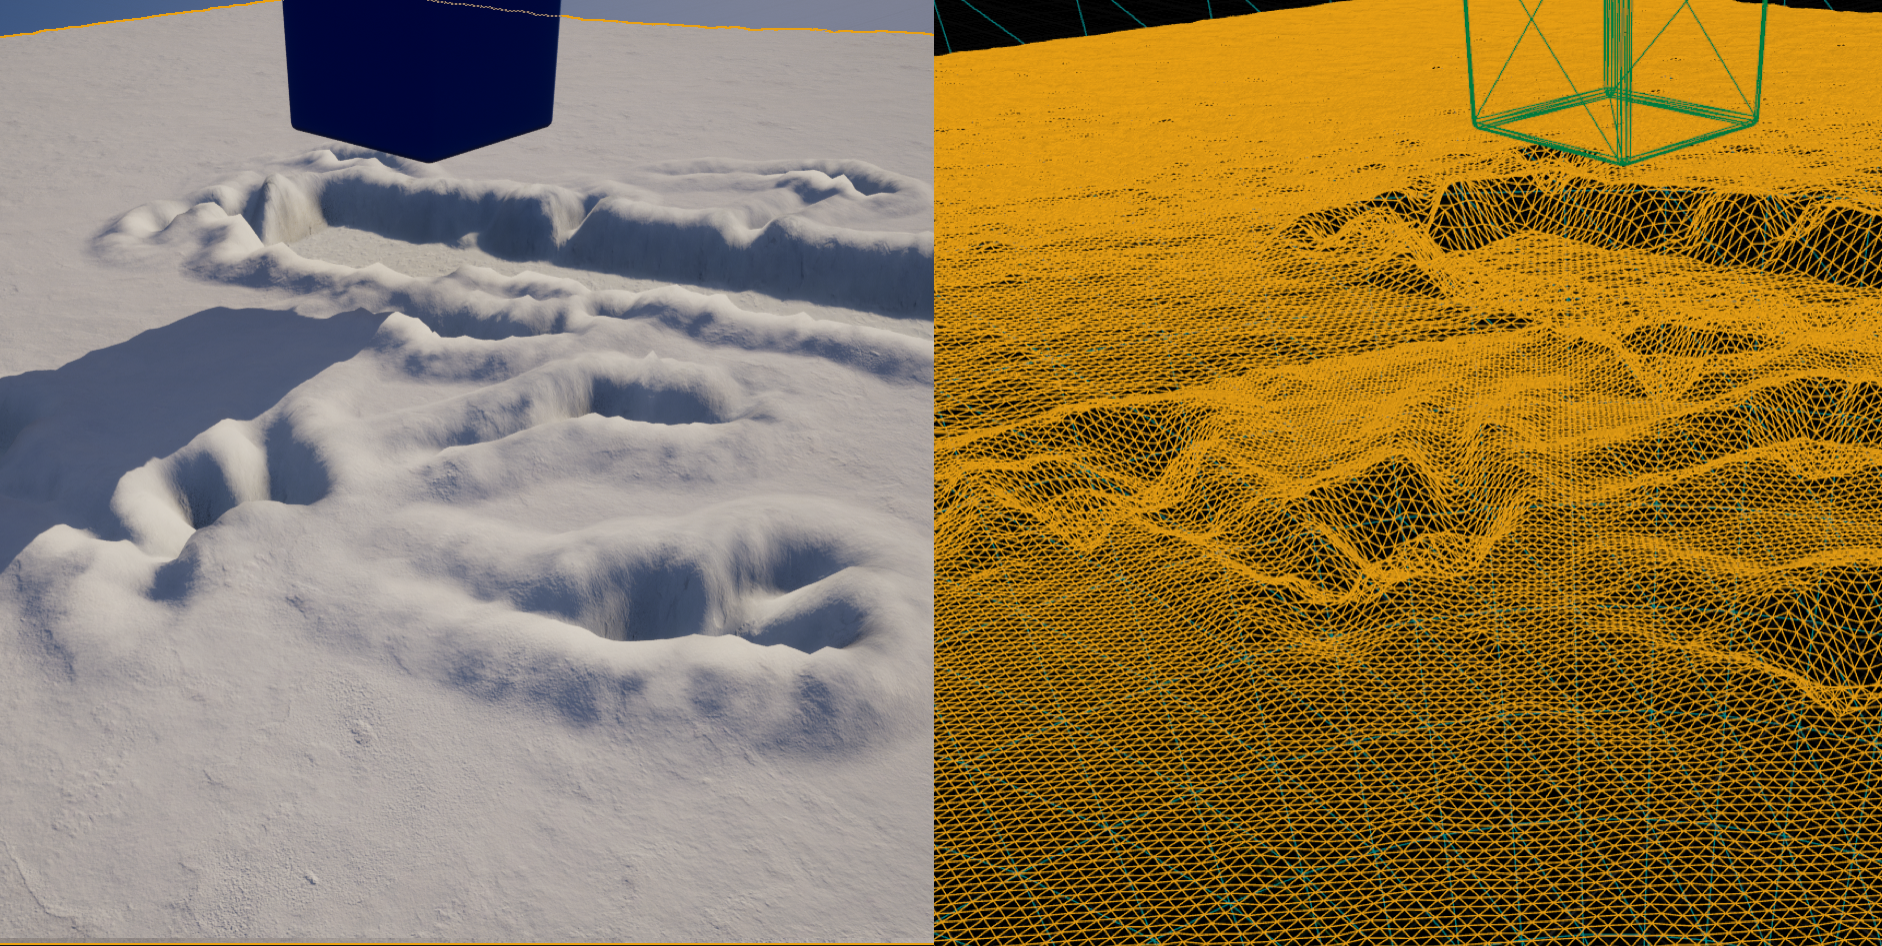
The plugin works by providing a new actor type called the Virtual Heightfield Mesh. This mesh takes the size of our landscape, and dynamically tesselates based on the camera location. While this handles the problem of tesselation for us, but we need to prepare our mask material to work with VHM.
 Left: Rendered Snow Displacement. Right: Underlying LOD driven by VHM. Note the increased LOD closer to the camera. This particular screenshot has been tuned with excessive tesselation for the purposes of this demo.
Annoyingly, Nanite meshes cannot write to a virtual runtime texture. This complicates our implementation, since we cannot write to our buffers inside the VHM material. Instead, I set our final snow material to construct itself on the Virtual Height Field mesh by manually sampling the RVTs written by the base landscape material.
Creating our Final Material
Our final landscape material is assigned to the Virtual Heightfield Mesh, which handles our tesselation and LOD calculations for us. All we need to do is provide world displacement by sampling our mask texture from our base landscape.
 Our Virutal Heightfield Mesh final landscape material.
First, we synthesize several Megascan materials for our Fresh, Rough, and Ground snow, utilizing our RGB mask to determine which material to render. You’ll notice that our fresh material references some noise textures to add flavor to our landscape, which is a quick hack to avoid excessive tiling in RnD projects.
Next, we have to calculate our normals. This was rather complicated, since I originally generated normals from our heightmap on our mask material and passed them through to our Virtual Height Field mesh via an RVT reference, but this ended up crashing my entire system and corrupting my material (hence the system restore I referenced earlier). So, I decided to completely rewrite this portion, and calculate normals on our VHM manually. This must be blended with normals generated from our height map, which required some manual (and tedious) conversion.
Finally, we calculate our world height by using a combination of math and referenced gameplay values (including our registered snow height from the projection camera). Similar to our normal calculation, I had to rewrite this section to account for the noise in the Rough snow and move it to the VHM material.

Improvements
Overall, I’m satisfied with the results. I was able to create an appealing snow trail system and prove that it can work with high quality textures. There’s some areas that could be improved upon, including support for stylized parameters and making the system more resilient (such as avoiding hardcoded numerics).
Enhancing the performance of our material masks is a key area for improvement. The heavy use of Spiral Blur is extremely costly, especially for frequent displacement. A more efficient approach may sacrifice fluidity in displacement and quality in mask aliasing, but improve performance.
I’ve also researched more advanced techniques for snow simulation, including algorithms such as the Material Point Methods (MPMs) for snow simulation, as detailed in this Disney Animation research paper. While traditional MPMs are too demanding for real-time use, we might be able to create a dynamic system inspired by a simplified version of this concept. This would focus on how snow breaks along seams, moving our calculations and snow dynamics away from pure-shader and material expressions to a combination of mesh deformation and FXs.
Additionally, I’m considering moving away from using Virtual Heightfield Mesh due to several issues, such as GPU memory constraints and unclear LOD (Level of Detail) calculations. With the (re)introduction of a Displacement attribute in Unreal Engine 5.2 for base materials, we may be able to bypass plugins like VHM altogether.
